BUILDING CHARLOTTE
Electrical System


*Disclaimer*
I am not a licensed electrician, mechanic, plumber or contractor and do not represent myself as such. All information is offered for illustrative and anecdotal purposes, only. To the extent permissible by law, I disclaim any and all liability associated with the reading, use of or reliance upon the information provided herein. We do not make any warranties about the completeness, reliability and accuracy of this information. Any action undertaken based upon the information provided on this website is strictly at your own risk. We assume no liability for any losses and/or damages in connection with the use of our website. Due to the serious inherent risks, all plumbing, contracting and electrical work should be performed by a licensed professional.
*Disclaimer*
Electrical systems are infinitely customizable. One of the first steps to designing an electrical system for your build is to determine what your present needs are. This would include conducting an energy audit. For many devices you can find the energy usage online. The Department of Energy maintains a database of Energy Star certified devices, which lists the annual consumption in kilowatt hours. There is also a crowdsourced database for a variety of devices over at altE Store. The information on that database is provided by users who have measured their device using a Kill-A-Watt meter. These devices are inexpensive and very easy to use, so it may be a worthwhile investment when planning your electrical system.
How do we turn kilowatt hours (kWh) per year into something meaningful for our energy audit? The first thing I like to do is to take the "kilo" out of kilowatt hours. Multiply your annual figure by 1,000. Now you have a total number of watt hours consumed per year. Next we can divide by 365 to get rid of that pesky "per year." Now we can see how many watts a given device will consume per day, but not all devices are in constant use. To make a better estimate of our energy use, we should divide our number by 24 to get the hourly usage. Then you would multiply the hourly consumption by the estimated daily usage.
For our example, let’s imagine you are planning to install a TV in your build.
Let’s assume the model we’re talking about is the Vizio D32F-F1, which has an annual consumption of 56.2 kWh. The Energy Star website lists the consumption based on 5 hours of usage per day, so we will need to factor this into our calculations.
56.2 kWh x 1,000 = 56,200 Watt Hours per Year
56,200 / 365 = 153.973 Watt Hours per Day
Since a battery’s capacity is measured in amp hours (Ah) we should determine how many watts per hour will be used.
144.109 / 5 = 28.822 Watts per Hour
Next, let’s assume that we watch an average of four hours of television per day. So we’ll take the hourly consumption and multiply that by four.
28.822 x 4 = 115.288 Watts per Day
To get to amp hours, we’ll need to do a little more math. Amps = Watts / Volts. The TV in our example is 120 Volts.
115.288 / 120 = 0.961 Amp Hours per Day
Before or after conducting the energy audit, it is important to consider how you will be using your build. For example, if your build absolutely requires air conditioning, it would be prudent to integrate a generator into the build or plan to be dependent on shore power. If the intention is to spend time away from shore power sources, it would be worth considering paring back high energy devices. Something else worth considering when planning a build is conversion loss. Even the best power inverters do not convert from DC to AC with 100% efficiency. The inverter itself will draw power, as well. By using as many DC appliances and fixtures as possible, you can avoid those losses. Unfortunately many DC appliances are more expensive than their AC counterparts, so this decision will likely be arrived at by balancing financial considerations with the practicality and accessibility.
When we worked on the layout of the bus, we spent a lot of time thinking about how we would be using each space. We knew that the passenger on the bus would probably be using their phone, so we decided to build a USB outlet into our couch. We also knew it would be a place to read, so we incorporated a reading light in our build. Designing your electrical layout is very important because you’ll ideally want to run all of your wiring before your ceiling and walls go in. Before installing our ceiling, for example, we decided to install a backup camera and spotlight to ensure we can safely drive in reverse. While it would have been possible to install those items after the ceiling and walls were installed, it was significantly easier to do so beforehand.
If you’ve decided what appliances and fixtures you’re using and how big your battery will be, you’re going to need to figure out where all that juice is coming from! Some people rely on generators, some people use shore power extensively, some people install solar and some people use a combination of some or all of the above. For our build, we wanted the flexibility of staying remote if we want to, while also maintaining the flexibility of growing our system in the future. Since we’re traveling with dogs and this will be our primary home, we built our electrical plan with the idea of potentially adding a mini-split air conditioner in the future. To make that a possibility, we installed a breaker panel with room to add a dedicated A/C circuit as well as a 50 Amp shore power inlet. We also determined that the best place to install a mini-split in the future would be the front bulkhead, so we made sure to reserve that space and use ¾” plywood to ensure we have a strong place to mount the indoor unit.
Solar was something that we went back and forth on, for quite a while. Our knowledge of solar was pretty limited and largely based on outdated information. We had assumed that solar would be extremely costly and not provide us with enough juice to power our lives. Thankfully there are a TON of resources online that made us realize the errors in our thinking. We decided to install as many panels as our roof could handle and a sizable battery bank, instead of adding a generator to our build. We scoured Craigslist to look for a deal on panels and we lucked out, once again. We ended up meeting a gentleman in Long Island whose family has a business installing solar - particularly large, commercial arrays. His side-hustle was selling surplus panels from those jobs. We connected with him online and told him what we were looking for and he was able to get us sorted out. We got three large, commercial panels that total over 1,000 Watts for only $450.00!
After we brought those panels home, we had to design our solar racking. We had quite a few ideas, but ultimately settled on a very simple solution. We mounted each of the panels to angle aluminum which was then bolted to angle aluminum we installed on the roof of the bus. We made our own cables with an MC4 wiring kit to be sure we had nice, solid connections for our system. Those cables were then routed through the roof through a special waterproof inlet.
Solar is all well and good, but what do you do at night? We had planned to use some standard Lead-Acid batteries as our power storage, but were ultimately talked out of it. @ezzydortoka on Instagram messaged us to ask us if we had considered Lithium, specifically recycled Nissan Leaf modules. When we told him we hadn’t, he presented a very strong case for why we should seriously consider rethinking our strategy. Ultimately we did, and we’ve been thankful for that fact. Because the Leaf modules don’t offgas dangerous vapors, we were able to install them in our electrical cabinet over the driver’s seat. They also proved to be much more compact and lighter than lead-acid, which made them easier to work with and also to find a place for.
Besides designing the system, overall, we had some special considerations to make. When building a house, you’d ordinarily run all of your wiring through the studs and joists that make up the walls, ceiling and floor. With a bus conversion, the ribs are only small hat channels and drilling a ton of large bore holes would really compromise the structure. Bus manufacturers typically run the wiring for their systems through a large conduit running from the front of the bus to the back. This is a perfect solution for keeping the wires tidy and safely tucked away. With our build, we had to put some serious thought into running the wiring through the bathroom, since it was on the side of the bus where the wiring was located. We’re not electricians, but we’re fairly certain that electricity and water aren’t the best of friends. In order to keep everything beyond the shower powered, we had to figure out a water-tight conduit. What we settled on was a section of aluminum square tubing. We attached the tubing to the ribs of the bus before and after the shower walls, so there weren’t any areas for stray water to sneak in. Beyond the shower, the electrical all runs behind our headboard and before it, we enclosed the wires in a reclaimed wood bulkhead. We also built a sort of conduit that crossed the front to allow us to run electrical along the passenger side of the bus. When we built up our flooring and insulation, we left a small cavity between the original floor and the plywood subfloor. We used that cavity to install lightswitches, DC power outlets and AC outlets.
Safety was one of our top priorities when designing and building our electrical system. We have dedicated circuits for every element of our configuration. To us it made sense to have everything independently powered and protected. There’s no reason a faulty should knock out our water pump or vice-versa. We also chose to use a fuse block with indicator lights so that we can easily discern if a fuse has been blown. Speaking of our water pump, we also decided to build in a switch to cut the power in case of emergency. It wouldn’t be difficult to pull the fuse if something bad happened, but having to look at the fuse panel to determine which fuse to pull is definitely slower than hitting an on/off switch.
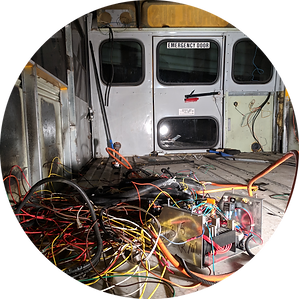
Aside from the house electrics, we also went through the bus systems with a fine-tooth comb. Doing so allowed us to eliminate a TON of excess wiring and ensure that there were as few potential points of failure as possible. Besides slaying Medusa, this also allowed us the opportunity to recycle some bits from the original bus. The massive cables that had powered the wheelchair lift were used in setting up our battery, inverter and shore power inlet. We even reused some of the switches for the driver’s fan, the rear heater and to make stealth mode! (We reused a momentary switch to disconnect our backup warning - we can still utilize the beeper by holding down the switch if we’re in a position where we need to signal). If you plan to dive into your own vehicle’s electrical system we would highly recommend reaching out to the bus manufacturer. Even though our manufacturer had been taken over by another builder, they were still able to provide us with very detailed wiring diagrams and schematics for our systems. These proved to be extremely helpful when we started working through things. Because some manufacturers incorporated emergency door interlocks, we would suggest trying to get those wiring diagrams before modifying anything.